We all know that our smartphones are essentially small computers. And like any computer, they need an IP address in order to connect to the internet. But what if your IP address is blocked or you need to change it for some other reason? In any case, it’ll be helpful to learn how to change your IP address on Android.
Well, you’re in luck! In this quick guide, we’ll show you how to change your Android IP address in a few simple steps. So whether you’re traveling and need a new IP address or your old one has been compromised, follow these steps and you’ll be good to go!
How to find IP address on Android
Before you can change your IP address, you need to know what it is. To find out your current IP address on Android, just follow these steps:
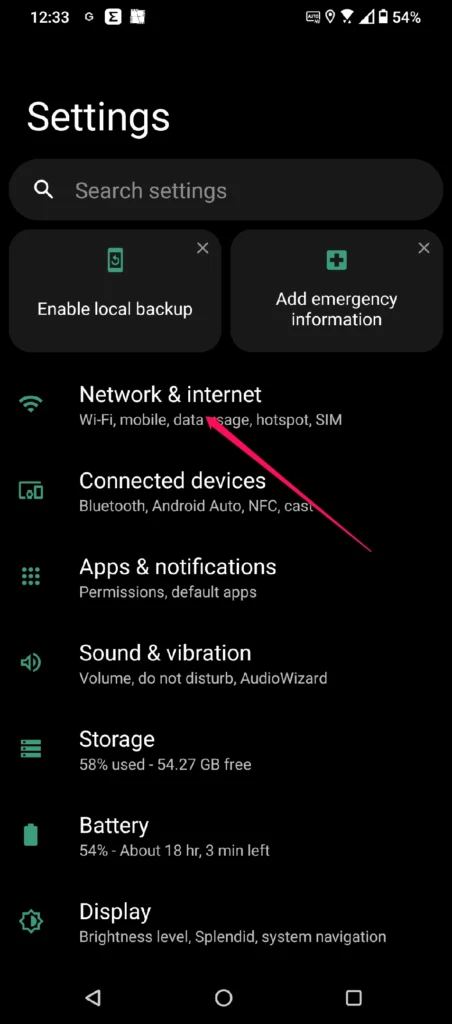
1. Open the Settings menu on your device and go to “Network & Internet“.
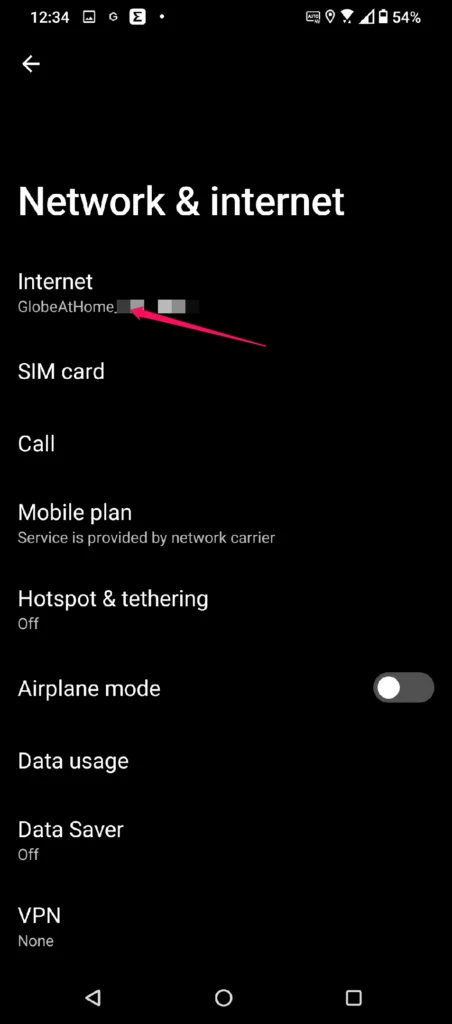
2. Select the network you’re connected to.
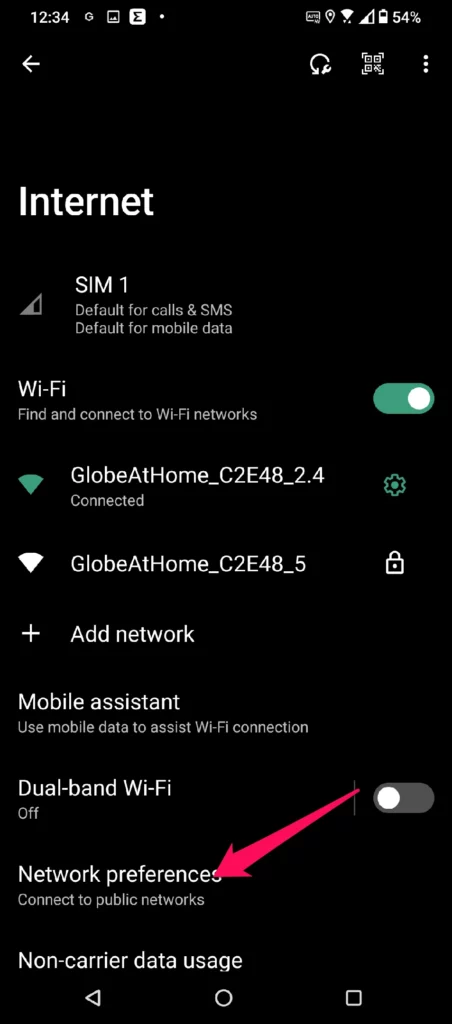
3. Tap on “Network Preferences“
4. Your IP address will be listed in the “IP address” field.
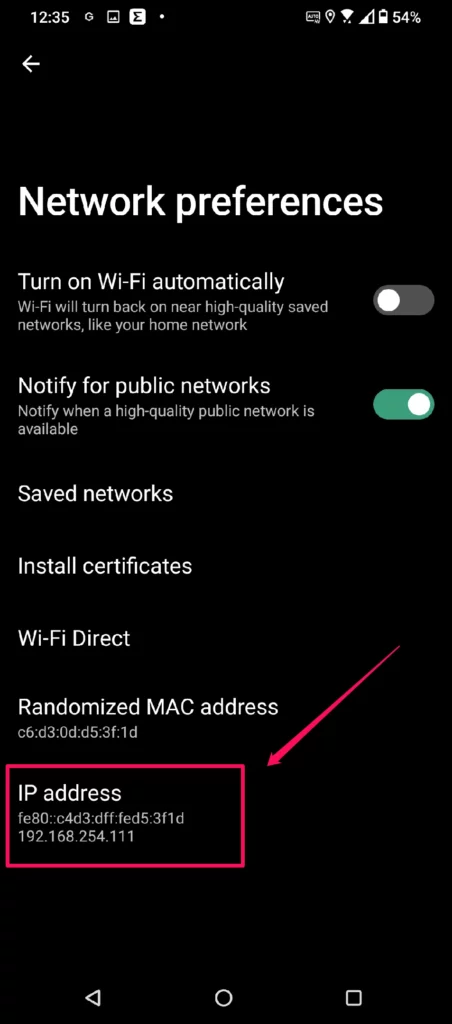
The actual steps may vary depending on your device, but the general process should be the same.
How to reset IP address on Android
Now that you know your current IP address, it’s time to change it. If you’re not too concerned about privacy, you can simply reset the IP address on Android. This will force your device to get a new IP address from your network. Here’s how you can do it:
1. Open the Settings menu on your device and go to “Network & Internet“.
2. Select the network you’re connected to.
3. Tap on the “Reset Network Settings” button. For this example, the icon is located on the upper right section of the screen.
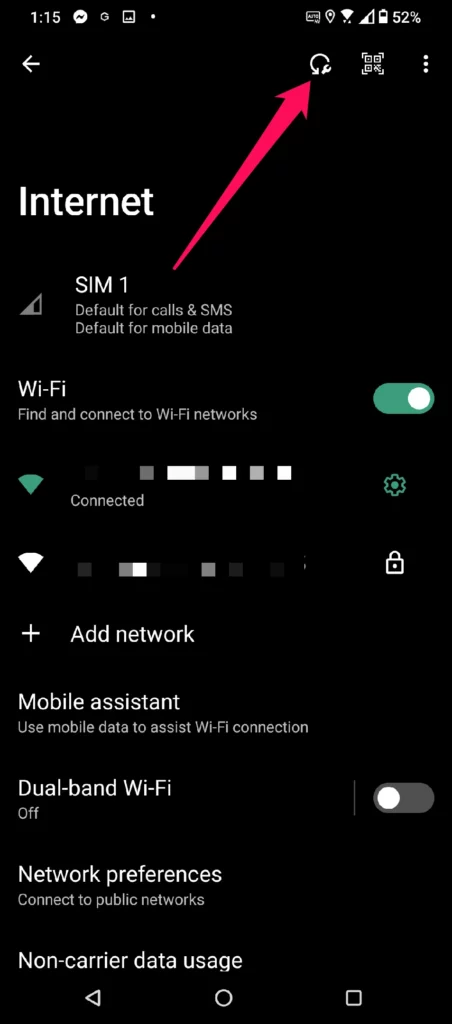
Note that this method will not allow you to choose a specific IP address. It will simply reset the address and assign you a new one.
How to change your IP address on Android
Now, going back to the issue of privacy, if you want to choose a specific IP address for your Android device, you’ll need to use a VPN (Virtual Private Network).
In essence, a VPN allows you to take control of your IP address by connecting to a remote server based in another location. This way, you can select a specific IP address unrelated to your identity or location.
Most VPNs also include additional features, such as encryption and ad-blocking, which can help protect your privacy even more.
Now, we will show you how to do this with ClearVPN — one of the fastest and most reliable VPNs on the market today:
1. You can download ClearVPN – the best VPN for Android from the Google Play Store ( Or you can download the app here.)
2. Run the ClearVPN app and tap the “Create an Account” button. Complete the signup process.
3. ClearVPN has a 3-day Free trial, so once you’re logged in, just tap on the main button and you will be connected to the optimal server in a second. 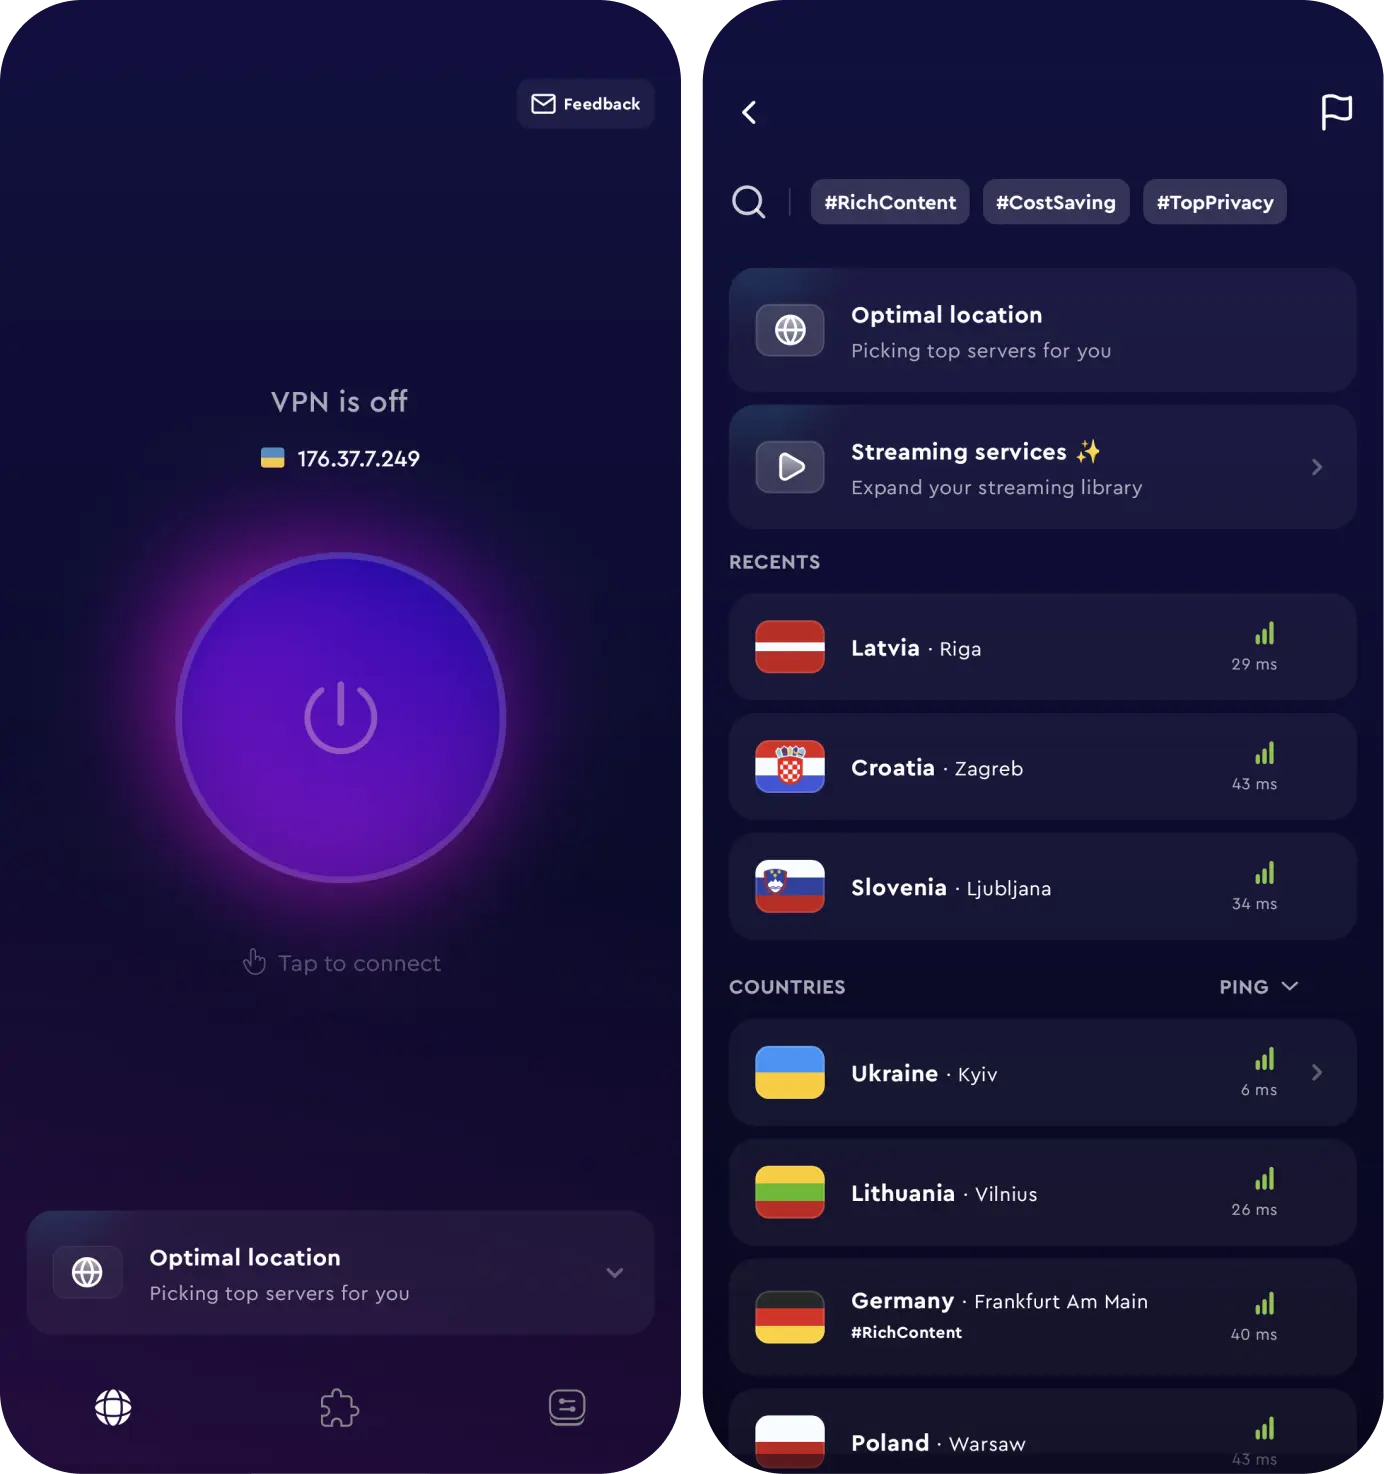
4. Another way to change your IP address is to choose any location from the Locations list, select the countries from the list, and click on it. This will start a VPN connection to a server located in that region.
5. And that’s it — you’ve successfully changed your IP address on Android!
Try ClearVPN for free and discover how easy and fast a VPN can be!
FAQs
Will my internet connection slow down when I’m using a VPN?
It depends on the VPN provider. Some VPNs are slower than others due to different server locations and bandwidth limitations.
ClearVPN is one of the fastest VPNs on the market today, so you can be sure that your internet connection won’t suffer while connected to it.
What are the risks of changing my IP address on Android?
There are no risks in changing your IP address on Android when using a reputable VPN provider such as ClearVPN. However, you should always be aware of potential scams and malicious websites that could pose a threat to your security.
Can I use a free VPN to change my IP address?
While plenty of free VPNs are out there, we do not recommend using them to change your Android IP address, and for good reason. For one thing, free VPNs tend to have slower speeds and limited servers. Free services are also more likely to collect user data, which could compromise your privacy and security.
Are there any VPN alternatives for changing your IP address on Android?
Yes, there are a few alternatives to using a VPN to change your IP address. For example, you can try proxy servers or Tor (The Onion Router). However, these methods don’t provide the same level of security and privacy as a VPN does. Additionally, they usually require manual setup, which can be complex and time-consuming.
How do I know if my IP address has been changed on Android?
The easiest way to check if your IP address has been successfully changed is to simply repeat the steps we outlined for finding it. The number should now be different from what it was before.
You can also open up a website like WhatIsMyIPAddress.com and compare the results with those you had before using a VPN. This will confirm that your IP address has been successfully changed. Want to know how to protect your IP address? Read our detailed guide by the link.
