If you want to take control of your online identity, learning how to change your IP address is a great place to start. Our computer’s IP address is the core of your online identity. Websites and other online services track IP addresses to recognize their users. Think of it as your digital address that enables others on the Internet to recognize and find you.
Fortunately, changing IP addresses is easier than you might think and can be done with simple steps. We’ll show you exactly how to do just that. This knowledge will help you protect your online privacy and anonymity and enable you to access geo-restricted or censored content from around the world. But before we will show you how to change your IP address on Windows, let’s discover where and how to find your IP address on your Windows PC.
How to find your IP address on Windows?
First, how do you find out your current IP address on Windows? Luckily, it’s actually very simple. Begin by opening the Command Prompt by typing “command” on the search bar. Then right-click over the command prompt and left-click on “Run as Administrator”. You’ll do this to make any change to your IP address using the command prompt (more on that later).
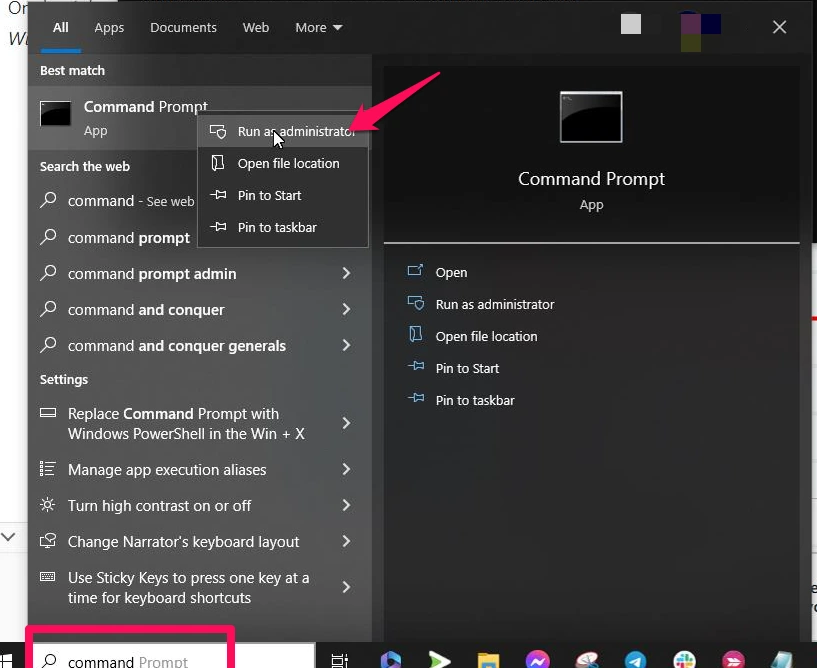
Type in the command “ipconfig” and press enter on your keyboard. Scan the results and look for “IPv4 Address”. This is your current IP address.
If this feels overwhelming, there’s a less technical way of finding your IP address. You can visit an online service like WhatIsMyIP, which automatically shows your current IP address.
How to change your IP address on Windows 10
Now that you know how to find your current IP address, you can verify if it changes after taking action. Now let’s move on to our focus — changing it.
There are several ways of doing this, but here we’ll focus on three methods; the manual method using the command prompt, changing your network settings or using a VPN (Virtual Private Network) service.
Changing IP address via command prompt
Now for the manual method — you’ll basically edit IP settings on Windows 10 via the command prompt (as a system administrator).
Type in this command: netsh interface ip set address local static xxx.xxx.xxx.xx
Replace the “x” with your desired IP address, which should change immediately. But note that the values you enter must belong to the same subnet as your router’s. If you’re unsure of what values to enter, you can use the “ipconfig” command again and take note of your Default Gateway. The IP address should have the same first three fields as that value. Otherwise, you will get this error.
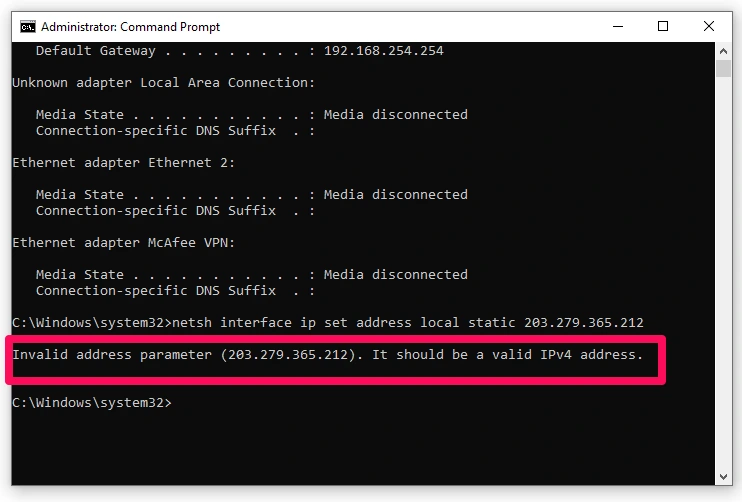
So for example, if your router’s IP address is 192.168.0.1, your new IP address should be something like 192.168.0.x, where the “x” can range from 2 to 254 (note that 1 and 255 are usually reserved for the router itself).
Change the IP address on Windows via network settings
If you’re uncomfortable using the command prompt, you can change your IP address through Windows Settings. To do this:
- Click the Windows icon and select “Settings“

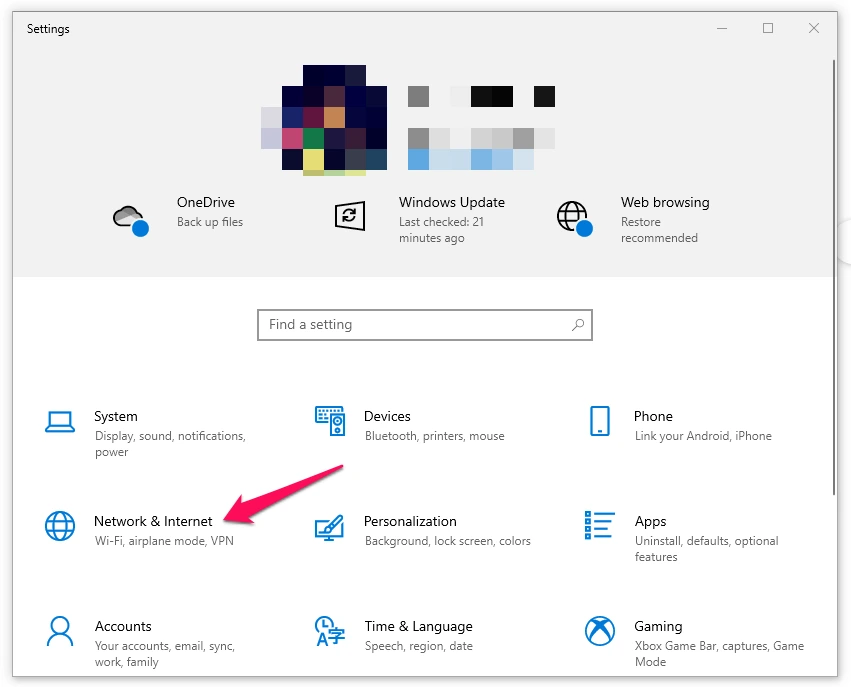
- Next, click on “Network & Internet“
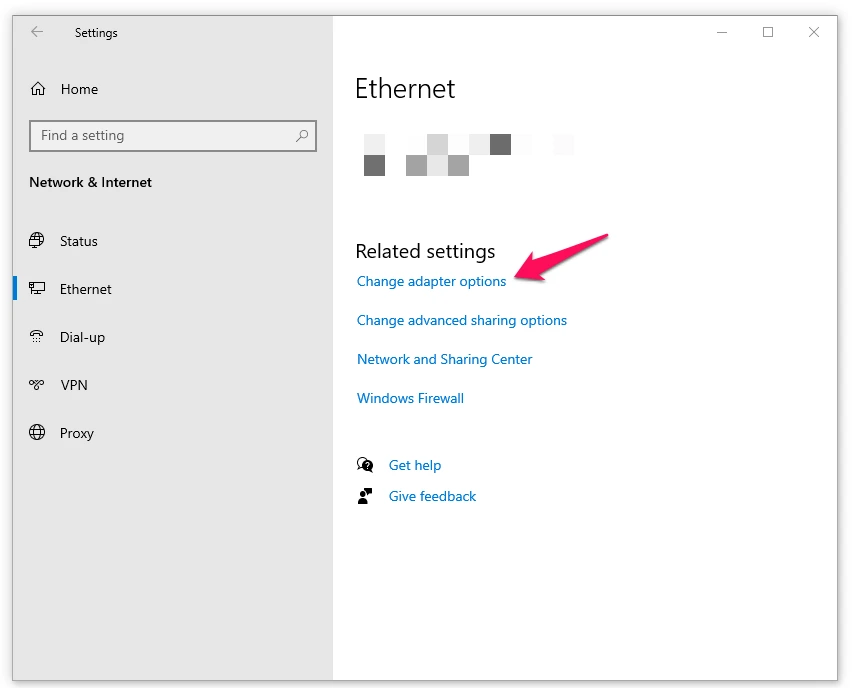
- Then select your currently active connection.
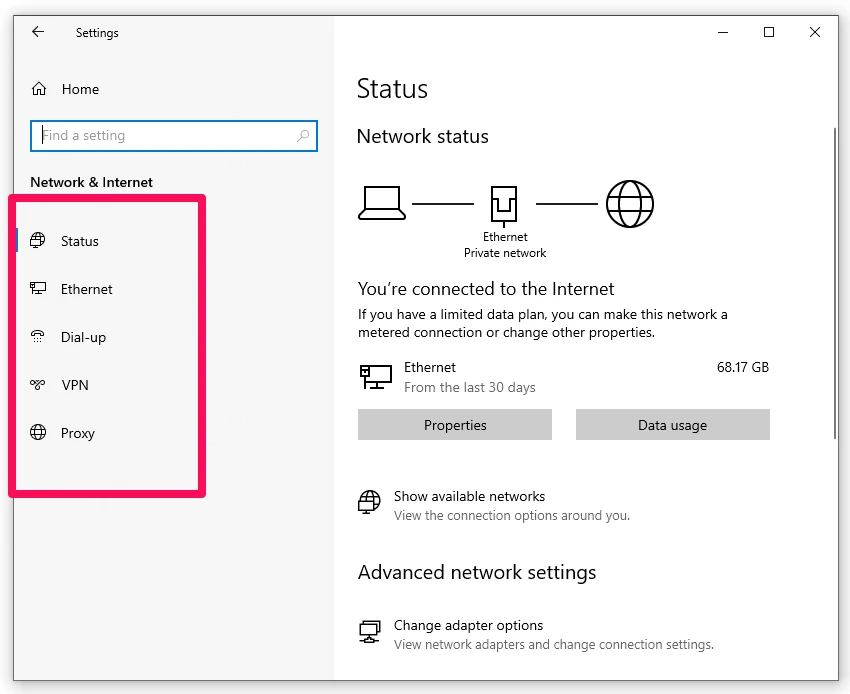
We use an Ethernet connection for this example, but the rest of the steps should be similar.
- Next, click on “Change adapter options“
- Right-click on your active connection in the next (Network Connections) window, then select “Properties.”
- Click on “Internet Protocol Version 4 (TCP/IPv4)”, then click on the “Properties button”.
You can enter your desired IP address in the next window (Internet Protocol Version 4 (TCP/IPv4 Properties). First, select “Use the following IP address”, then enter your new desired values for the IP address, Subnet mask, and Default gateway fields.
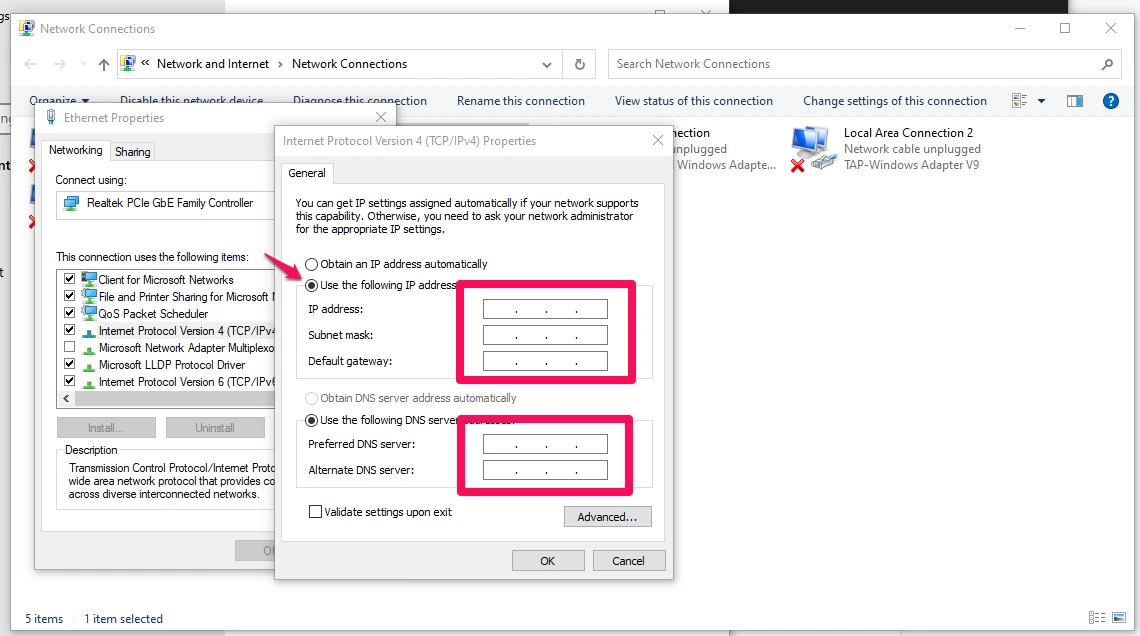
Again, the values you enter must belong to the same subnet as your router’s. To ensure the values you key in are valid, tick the box next to “Validate settings upon exit.”How to change your IP address on Windows 11
- Click Start > Settings > Network & internet
- Choose your connection Ethernet or WiFi > Manage > Edit ( IP assignment)
- Right under Edit network IP settings > Select Manual > Turn on IPv4 > Fill IP address, Subnet mask, Gateway, and Preferred DNS boxes to specify IP address settings.
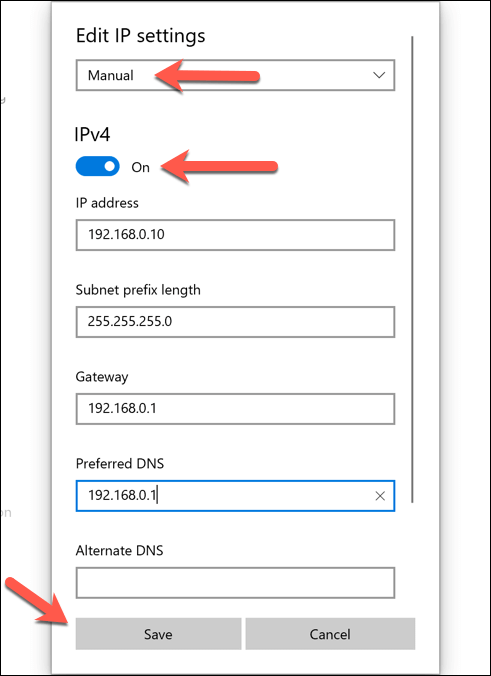
- Click Save to activate your new IP settings.
How to change your IP address on Windows PC with a VPN
As you may have already realized, the manual methods to change IP address on Windows can be a hassle. If you’re uncomfortable using the command prompt or navigating through Windows settings, then using a VPN is probably the best bet.
A VPN masks your current IP address and makes it appear as if you are located somewhere else. This is great when attempting to bypass country-specific restrictions on the content or accessing geo-blocked services.
To use a VPN, you’ll need to first sign up with the service provider of your choice and download their app. Once the app is installed, connect to the server of your desired location, and your IP address should be changed automatically.
To see just how fast and easy this process is, we’ll reference the steps to do this with ClearVPN, one of the fastest and most reliable VPN service providers available. The steps should be pretty similar to those for other VPNs as well.
1. Go to ClearVPN for Windows app page and click on the “Download ClearVPN” button.
2. Run the Installer app and wait for the installation process to finish.
3. Open the ClearVPN app and log on to your account. If you don’t have an account yet, you can create one and get started for free (with restrictions).
4. Once logged in, just click on the big juicy button in the middle of the screen, and it’ll automatically connect you to the optimal VPN server.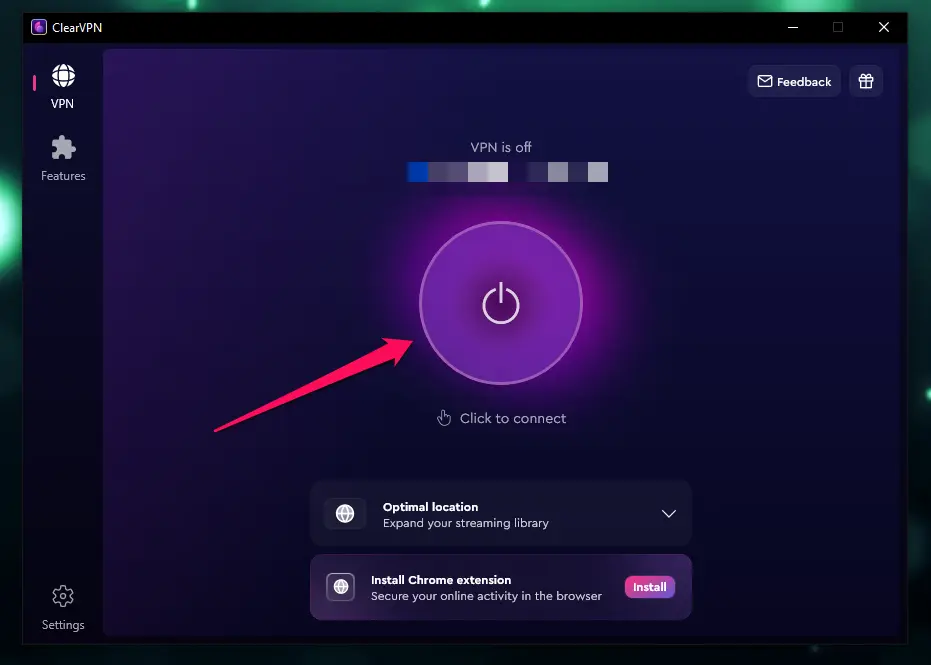
You can also choose your desired server location by clicking on the locations button at the bottom of the screen under the big button and selecting one from the list. ClearVPN now has 50 locations.
And that’s it — how to change Windows 10 and 11 IP settings! Now you can enjoy access to geo-restricted content and services, all while remaining secure online. Also, if you want to know how to protect your IP address from hackers, check our detailed guide too.
