At a time when privacy concerns are at an all-time high, it is more important than ever to take control of your online presence. One way to do this is by utilizing a private DNS (Domain Name System) service. But what is it really? What other options do you have when it comes to protecting your online privacy?
In this guide, we’ll go over everything you need to know about private DNS, how it works, and why it’s an essential tool for safeguarding your personal information online. We’ll also take a look at another (and better) alternative to private DNS that you may want to consider.
Let’s jump in!
What is Private DNS?
Before anything else, let’s take a moment to understand what DNS is and why it matters for your online privacy.
DNS is essentially the internet’s phonebook, translating human-readable domain names (e.g., google.com) into IP addresses that computers can understand. This process occurs every time you type in a website address or click on a link, allowing your device to connect to the correct web server and load the requested webpage.
But why is this relevant to your online privacy? Well, DNS requests are typically sent in plaintext, meaning that anyone with access to your internet activity can potentially intercept and view these requests. This enables them to see what websites you’re visiting, regardless of whether the connection itself is encrypted. This is where Private DNS comes into play!
You can think of it this way — using Private DNS is like using a secure tunnel that encrypts your DNS requests and shields them from being seen by unwanted third parties. This extra layer of protection can significantly enhance your online privacy.
What is private DNS mode?
On the topic of Private DNS, you may have come across the term “private DNS mode.” This essentially refers to the setting on your device that allows you to use a specific DNS server for all your internet connections.
By default, most devices use their Internet Service Provider’s (ISP) DNS server, which may not prioritize privacy. However, switching to ‘private DNS mode’ allows you to choose a different DNS server that aligns with your privacy preferences. For example, you can opt to use a secure and privacy-focused DNS server such as Google’s Public DNS.
How Private DNS works?
Now this brings up a question — how exactly does Private DNS work?
When you enable private DNS mode, your device will first send a request to the configured secure DNS server before accessing any website. Private DNS servers then encrypt this request and forward it to the website’s actual DNS server. Once the encrypted response is received, it is decrypted by the secure DNS server and sent back to your device.
This process ensures that your DNS requests remain private and secure, as they are encrypted throughout the entire journey.
Benefits of using Private DNS servers
Aside from enhancing your online privacy, there are several other benefits to using Private DNS. These include:
- Improved speed and reliability: Private DNS servers tend to have a higher performance rate compared to default ISP servers, resulting in faster website loading times.
- Enhanced security: Private DNS servers often have built-in security features, such as blocking access to malicious or phishing websites, further protecting you from online threats.
- More control over your internet experience: By choosing a specific Private DNS server, you have more control over what content you can access and the level of privacy protection you desire.
Private DNS vs VPN
Now, you may be wondering how Private DNS differs from a Virtual Private Network (VPN). While both aim to enhance your online privacy, they work in different ways.
Private DNS encrypts your DNS requests, while a VPN encrypts and routes all of your internet traffic through a secure server. In simpler terms, using Private DNS only protects your DNS requests, while using a VPN protects all of your internet activity.
For example, if you’re using a VPN, your ISP will only see that you are connected to the VPN server and not the specific websites you visit. On the other hand, using Private DNS does not hide your internet activity from your ISP while protecting it from being seen by third parties.
So, should you use a VPN or DNS? Well, the answer depends on your specific needs and preferences. If you prioritize privacy protection for only certain online activities, Private DNS may be sufficient. However, if you want overall protection for all of your online activities, a VPN may be the better option.
How to set Private DNS on Android?
Now that we’ve covered the basics of Private DNS, let’s walk through how to set it up on your Android device.
Note that the process will vary depending on what version of Android you have, but the general steps are as follows:
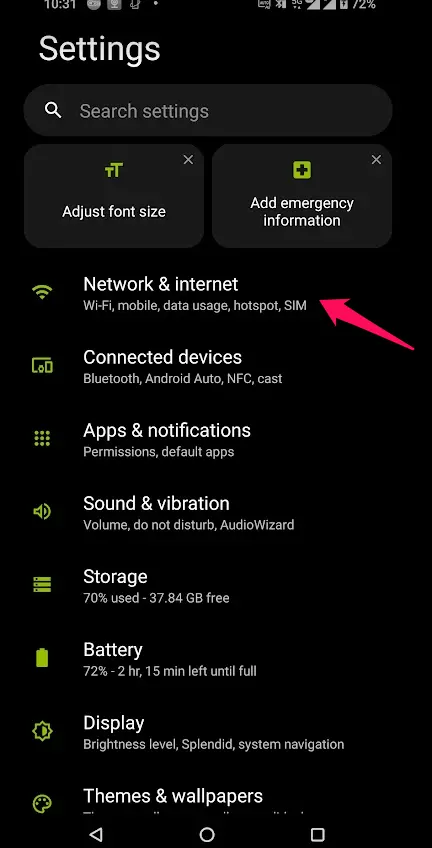
- Go to your device’s Settings and select “Network & internet”.
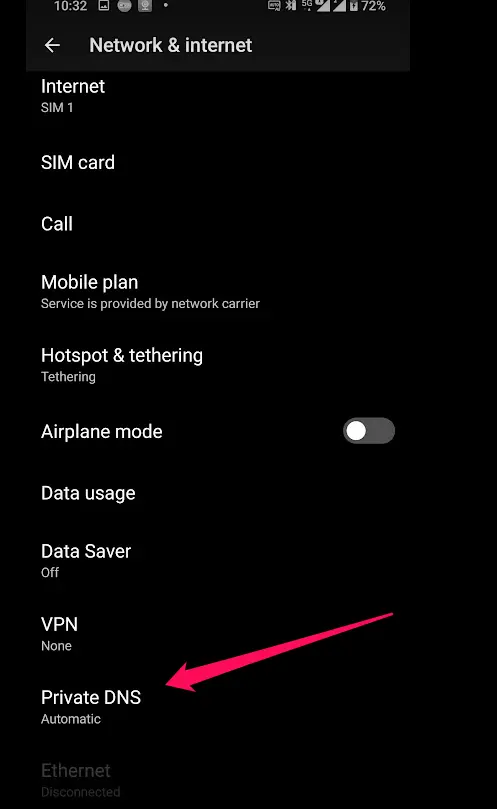
- Tap on “Private DNS”.
- Choose the option for Private DNS provider hostname.
- Enter the desired DNS server address. For example — “dns.google” or whatever specific DNS server you prefer. You can usually find this information straight from the server’s website.
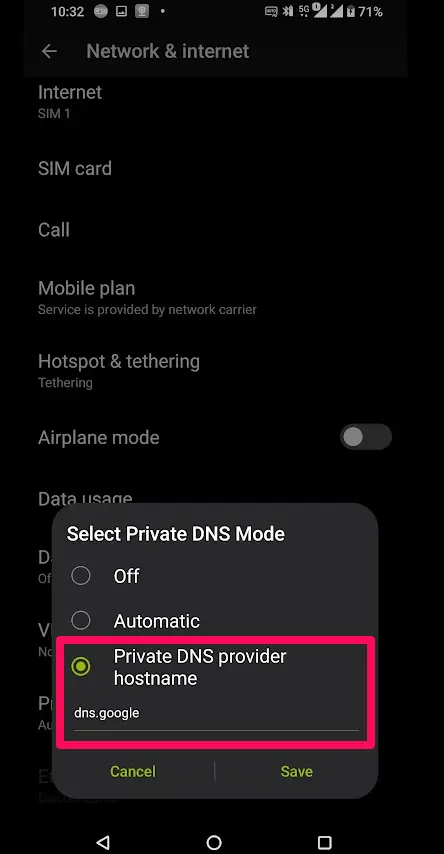
- Tap “Save” to apply the changes.
And that’s it! Your device will now use the chosen Private DNS server for all internet connections. Note that these servers may occasionally be down, so it’s always a good idea to have an alternative DNS server as a backup.
How to set Private DNS on iPhone?
So what if you’re an iPhone user? Well, the process is a bit different compared to Android, but it’s still relatively straightforward.
Here’s how you can set up Private DNS on your iPhone:
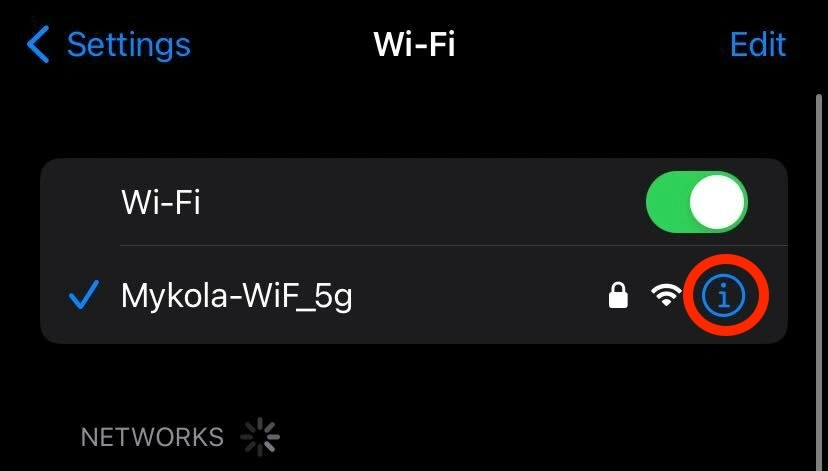
- Go to your device’s Settings and select “Wi-Fi.”
- Tap on the “i” icon next to your current Wi-Fi network.
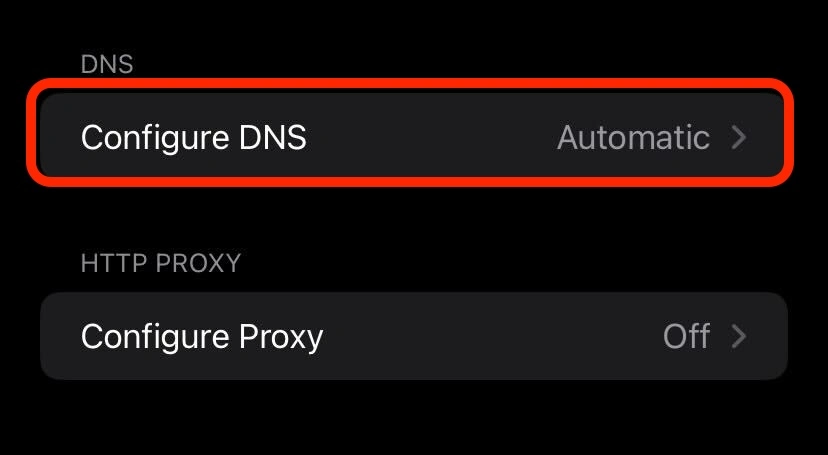
- Scroll down and find the DNS section, then tap on “Configure DNS.”
- Select “Manual” and tap on “Add Server.”
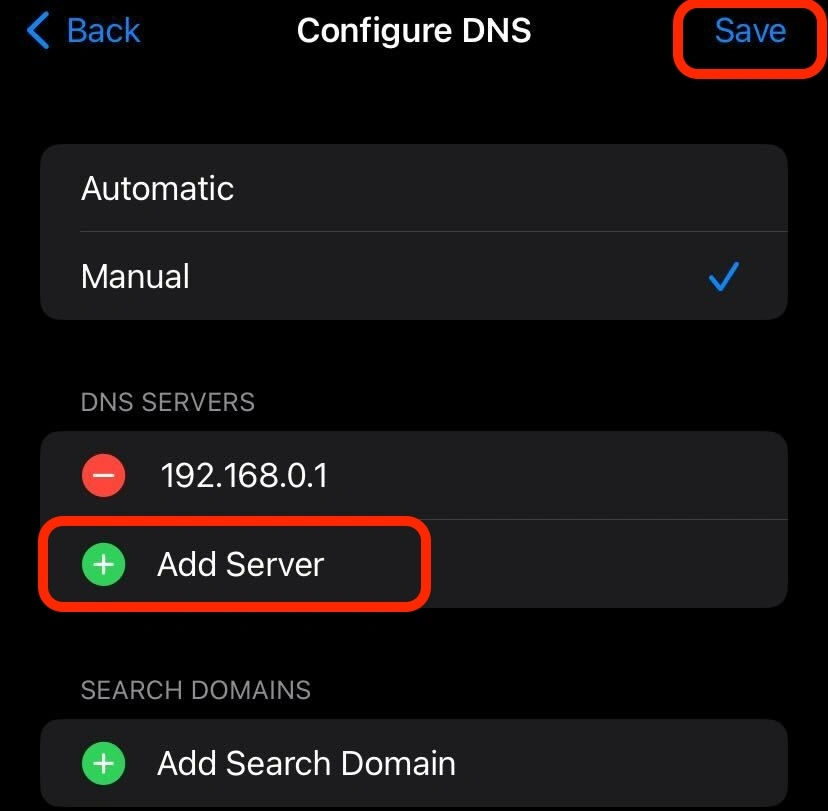
- Enter the desired DNS server information and tap on “Save.”
Note that on an iPhone, you have the option to either specify the DNS server (IP address) or input the domain name of the server. For example, you can enter “dns.google” instead of the IP address for Google’s Public DNS (8.8.8.8). Either way, once you save the changes, your device will use the chosen DNS server for all Wi-Fi connections.
Limitations of Private DNS
We touched on this briefly earlier, but it’s worth mentioning again that Private DNS has its limitations.
One major limitation is that using Private DNS does not hide your internet activity from your Internet Service Provider (ISP). Your ISP will still be able to see which websites you visit, as well as the content you access on those websites.
Another limitation is that Private DNS only encrypts your initial request. Once the encrypted response is received, the connection to the website is no longer encrypted, leaving it vulnerable to potential privacy breaches.
For example, if a website is not secure (i.e. doesn’t use HTTPS), your ISP can still see the unencrypted data being exchanged between you and the site. This is where using a VPN may be more beneficial, as it encrypts all of your internet activity.
The Case for VPNs
If your goal is to enhance privacy and security, using Private DNS may not be sufficient. While it does encrypt your initial request, this only applies to DNS requests and not the actual connection to the website. This means that if a website is not secure, your data can still be accessed by third parties.
On the other hand, VPNs encrypt all of your internet traffic, providing an additional layer of privacy protection. They also hide your IP address, making it more difficult for websites and third parties to track your online activities. While Private DNS offers a degree of privacy protection, using a VPN may be a better option for those who want comprehensive security and privacy while browsing the web.
Plus, using a VPN has become extremely easy, and does not require you to fiddle with any settings. To show you just how easy it is, let’s quickly walk through how you can accomplish this with ClearVPN — a powerful and user-friendly premium VPN service with 48+ server locations around the world.
Here’s how to get started with ClearVPN:
- Download and install the ClearVPN app on your device. You can do this directly from the ClearVPN website (Windows or MacOS) or the App Store/Google Play Store (mobile devices).
- Run the ClearVPN app and sign up for an account.
- Once you’re logged into the app, simply click on the connect button to start browsing securely!
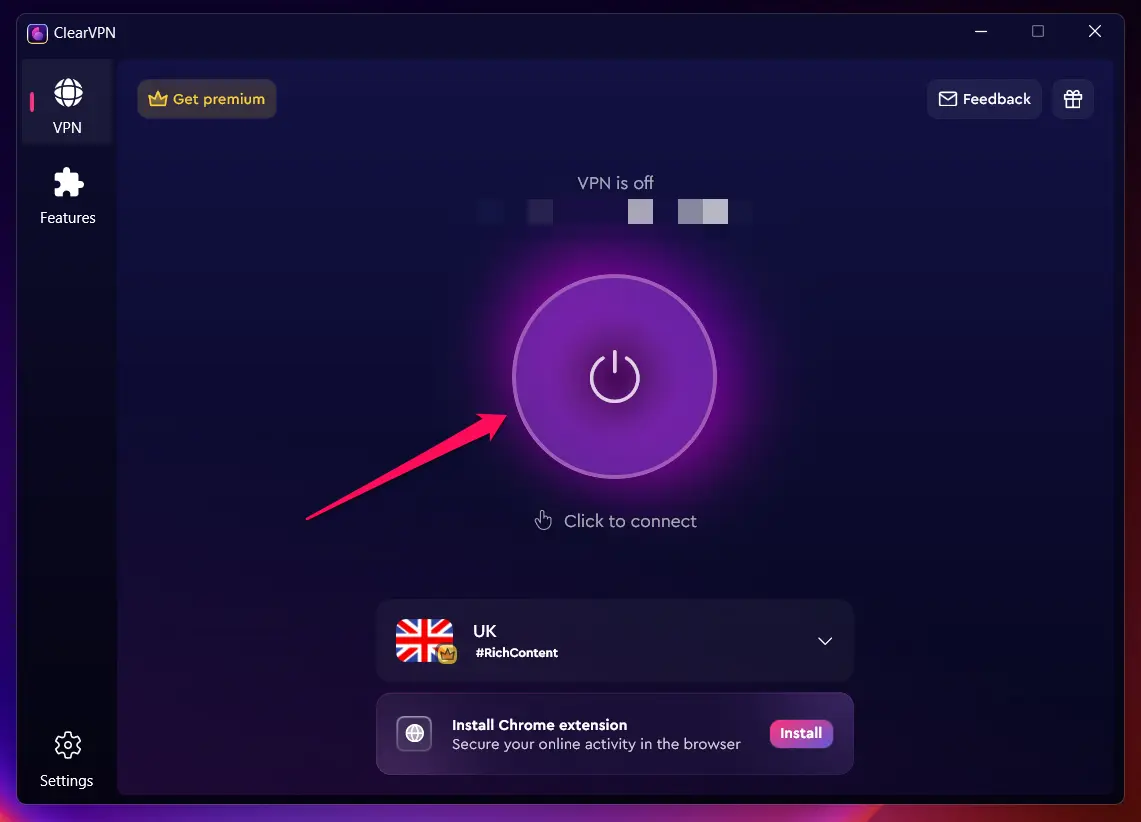
That’s it! With just a few clicks, you can easily connect to a secure remote server and start protecting your online privacy. ClearVPN also offers additional features such as ad blocking, anti-tracker, and content unblocking for a better browsing experience.
Note that the exact steps will vary depending on the VPN service you choose, but most premium VPNs offer an intuitive and user-friendly interface for easy setup similar to the ones described above. Notice that with VPNs, you don’t have to worry about setting up different servers or providers — it’s all taken care of for you.
FAQs
Can I use private DNS to block ads?
No, Private DNS is not designed for ad blocking. While it may block some ads by default due to its nature of encrypting DNS requests, it’s not a reliable method for eliminating ads.
What is the best private DNS server?
The best private DNS server will depend on your specific needs and preferences. Some popular options include Google Public DNS, Cloudflare DNS, Quad9, and OpenDNS.
Is 1.1 1.1 still the fastest DNS?
As of writing this, Cloudflare’s 1.1.1.1 is still considered to be one of the fastest DNS servers available by many experts and users alike, but this can change over time as other DNS providers improve their services.